Windows 7 Bootcamp For Mac
Boot Camp 4.0 for Mac OS X 10.6 Snow Leopard up to Mac OS X 10.8 Mountain Lion version 10.8.2 only supported Windows 7. However, with the release of Boot Camp 5.0 for Mac OS X 10.8 Mountain Lion in version 10.8.3, only 64-bit versions of Windows 7 and Windows 8 are officially supported.
Installed windows 10 via bootcamp on my MBP running macOS Sierra, but I'd like to expand the Windows partition and shrink the macOS partition, avoiding a reinstall if possible. I did a search already, but the other questions I've found on this topic are 1) about windows 7 and 2) just suggest using WinClone or similar. How would this be done manually without the use of paid utilities?
Edit: I've used gParted from an ubuntu live USB to resize the windows partition. The only issue now is that windows throws an error on boot. Online sources suggest using gdisk to somehow sync the GPT and MBR tables? (I have data backups and mac OS boots fine, so now it's just a matter of curiosity and avoiding a reinstall if possible). Don’t ever touch the partitioning from Windows! No Windows app can figure out how it is being ‘fooled’ into thinking it’s in charge.
There are only 2 apps that won’t simply break Boot Camp completely, Paragon Hard Disk Manager & TwoCanoes WinClone. Afaik, neither can yet handle APFS. Carbon Copy Cloner can safely back up HFS & Boot Camp partitions, but cannot by itself recreate them, you must complete the underlying formatting first. Apple’s own Disk Utility will not allow you to even attempt this.
The Apple-recommend method is to completely remove Boot Camp & start over with a bigger partition size. Indeed, it is a valid point. I've been on the other side of the table, having to work with people who either dont want to spend much money or they did the previous mistake and it is me who has to repair it by hand, thats why I allways try to find the non-conventional way.
I've screwed many disks, but I only lost information once because dd didn't copy the disk properly but didnt throw a warning. Since then I allways check manually if backups are done correctly and never made a client lose a single bit. Btw: removed the downvote and gave you a +1, considering possible mistakes from future users – Nov 21 '17 at 19:57. You have to use a partition utility like GParted. If you are using APFS as filesystem GParted cannot modify it. You'll have to find a tool able to do so, and do the resize in parts, first the physycal APFS partition and then the Windows NTFS.
If there's no software which automatically does it it involves a VERY HIGH RISK of data loss. Keep this in mind and backup your data (or whole disk) before. If you want to try the 'easy way' first follow this guide about. It will only work properly if the NTFS partition of the Windows installation is a proper NTFS partition. Keep in mind that BEFORE doing this you'll have to shrink your mac partition using mac's Disk Utility.
It will not allow you to make the bootcamp bigger, but it will make room for you to enlarge it with MiniTool (or any other tool capable of working NTFS under the partition layout your HDD has). The full procedure is explained: Yesterday expanded my bootcamp partition from 50 up to 100 Gb using Mini Tool Partition Wizard Home Edition, a Freeware Windows Program after seeing this video: Note that I have OSX Mavericks, Steps are: 1) backup all your files (optional but strongly reccomended). 2) Using OSX Disk Utility resize MacintoshHD partition leaving unallocated space as much as you need to add to bootcamp partition. 3) Set Bootcamp as Boot Disk and restart the mac. 4) in Bootcamp with Windows running launch Mini Tool Partition and select the bootcamp partition.
5) Choose 'expand' option in order to expand the partition using all the unallocated space. 6) The program prompt to you to restart the mac for apply the task, cause is not possible while the partition is mounted and windows running.
7) Restart the mac and then automatically Mini Tool Partition will do the job in a 'graphic msdos like' form. Now the long way around: First of all, before doing anything MAKE A BACKUP OF YOUR HARD DISK. For zero risks use dd (diskdupe) to backup every single bit of the harddisk into a disk image. You can check how to do so. If you dont want to risk to reinstall everything from scratch make sure your backup contains the partition table and the partitions, or that you are totally able to restore that backup, even if you bought a new hard disk. This is a critical step if you're not confortable with partition modification (its recomended even if you are). Whenever you touch a partition you are risking your data, and even though most times there will be a way to recover your info even if you screw it up without a backup, there are chances you'll overwrite important data and loose it forever.
The risk depends on the operation performed and resizing is a particularly risky operation! If you are curious about what partitioning is about, you can check this to get some insights of what you are actually doing. Then you have three chances:. Install a partition edition software on your Mac. I'm not a mac user, so I can only give you one example, which I believe it is included in mac distros. You can check to find more examples. All I could find on google was comercial software, but as I said, I'm not a mac expert, so there may be a GParted port around or something like that.
Boot using a liveCD/USB like or and use GParted which is installed in the live distribution. There are many CDs to do this, like Partition Wizard, Partition Manager, Partition Magic, etc. In order to use thid method you will check, which is a different topic. Do it from your Windows OS instead from MAC following a Windows tutorial. There are plenty around, like. Personally I allways use liveCDs to modify partitions, as they are much safer. Because if you resize a partition you are using (from whithin the native OS) your system has to reboot and enter in some short of 'special boot envinronment' (its not that, but just to simplify) and resize the disks from there.
Those aditional steps add many failure points to an operation which is enough risky by itself. If you can, allways resize OS partitions from liveCDs. And remember, make backups! This is a critical step, and deserves to be repeated over and over my post. MAKE BACKUPS! I'm sure you can shrink (or increase) the virtual windows partition first and then the actual partition.
I don't know if the guy who said it is impossible took all his knoweldge from youtube tutorials or he's an actual computer engineer, but as a compute engineer i'm telling you there's no such thing as impossible, specially if apple provides a tool to resize. However, take into consideration what he said and DO A BACKUP!
More questions about APFS resizing. @tetsujin This is for older versions: This uses disk utility and then partition magic,but could be gparted from boot disk.This guy does it in the wrong way using partitiion manager from windows. They changed the filesystem, but there has to be some tool to handle it, for sure, and if not, he can allways drop the info to a new FS. If you are right (which i highly doubt) and there's no tool to do it in a single step with the new FS you could enlarge the APFS and THEN the virtual partition underlying.
– Nov 21 '17 at 19:19.
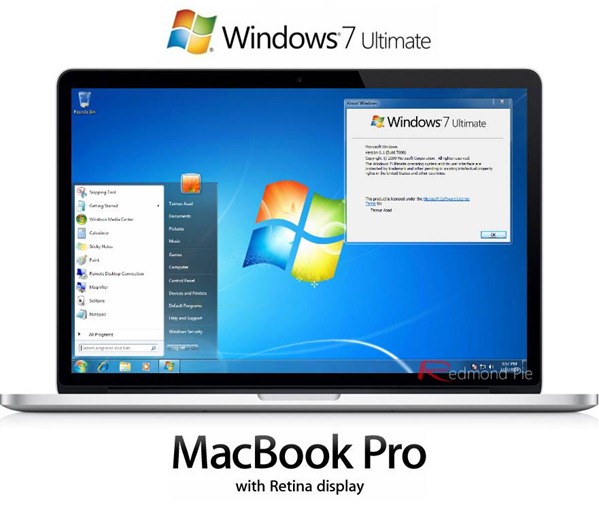
If you own a MacBook Pro chances are pretty good that you’ve investigated something like the OptiBay which lets you replace your optical drive with a second hard disk. After I did a few months ago I started to look at installing a copy of Windows 7 on my Pro for things like League of Legends and the occasional Windows app.
Unfortunately Boot Camp Assistant doesn’t like it when you’ve modified the Pro and there are some other snags that you’ll run into along the way. Through a few hours of trial and error I’ve come up with solutions to the problems that I’ve faced, so it’s time to pass on those fixes to you in hopes that maybe you won’t waste as much time as I did. Here is my step by step guide to install Windows 7 on MacBook Pro. The Boot Camp process is relatively straightforward. The Assistant will download a set of drivers for Windows to install and then it will allow you to select the size of the partition that you want to make. After the partition is created, your machine will restart and the Windows installation begins. From here it’s a matter of clicking Continue a number of times and then you’ll have a dual-booting MacBook.
Well, almost. If you have a MacBook Air, Boot Camp doesn’t look for an optical drive. But if you have a MacBook or Mac Pro it will scream at you when you load it up. You can ignore the warning, but the assistant will stop dead in its tracks once you’ve selected your partition size. “The installer disc could not be found” is going to be the message that gives you fits. So let’s start from the beginning.
First, take that ISO of Windows 7 and use Microsoft’s DVD/USB Download Tool to make a bootable flash drive with it. Of what’s going on, but it’s a very simple process. Make sure you keep a copy of the ISO on your Mac. Once you have that completed, make sure that you have installed Toast. Locate that copy of the ISO on your Mac and right click it to open the menu, select Services, then use the Mount It option. This will “fool” OS X into thinking that you have a physical optical drive and the Windows 7 disc loaded into it.
This is the solution to “The installer disc could not be found”. While the obvious answer here is to mount the disc image with OS X’s tools, they won’t work because the Assistant knows that you don’t have a physical disc in place. It’s quite possible that there are other ISO mounting apps that will work for this, but I can only verify that it works with Toast.
Now that you have the bootable USB and the ISO mounted, start Boot Camp Assistant and follow the steps. You’ll have two options that you can select at first. Make sure that both are checked, and then proceed to the next screen. On here, select “Save a copy to an external drive” and then click Continue to choose the path that you want to use.
You can not save these files to the bootable USB without some prior customization, so I suggest a second USB drive or just saving them to a folder on your desktop. If all goes well, you’ll have a dual-booting installation of Windows 7 on your Mac or MacBook Pro, no optical drive required. Potential Problems There are some snags along the way, and but they’re fortunately quite easy to avoid or work around. The first problem is that Boot Camp Assistant under Mountain Lion does not appear to format the partition to FAT, which is required for Windows to install. Fortunately you can do this yourself during the installation process. Just select the partition labeled BOOTCAMP and click Format.
This does not appear to have any ill effect on your OS X installation, but please make sure you have a current backup in place. You’ll probably think that your computer has frozen during the installation, as you’ll get stuck on a solid gray screen for periods that seem to last longer than they should. On many occasions I had to wait 3 or 4 minutes on these screens before the installer would continue. The next problem you’ll likely encounter is more of a curiosity than a serious issue.
Chances are you’re using a smaller SSD as your main drive, with a large-capacity, spinning drive as your secondary. It would make sense to install Windows to that second drive, but it doesn’t always work. On a couple of occasions it appeared that no master boot record was written to that drive, as opposed to the main drive where it worked every time. Your milage may vary, but I eventually relented into a 20 GB partition on my SSD rather than dealing with the headache of a missing MBR. The final (and perhaps most frustrating) problem that you’re likely to encounter is a Windows error on installation. Chances are it will be “ error 0x8030024” which tells you “Windows is unable to install to the selected location” after you’ve pointed the Windows installer to the partition that you want to use.
The problem here seems to lie in having more than one drive active in the system. Disconnect one of the drives. I know, it’s a pain in the tail, but I can tell you from my experience that it worked flawlessly. Interestingly the Windows installer doesn’t always stall when you have two drives installed, and there doesn’t appear to be any logic to whether it will work or fail. But if it fails, just disconnect the second drive and restart the installation.
Oh, and one last tip – If you find yourself stuck with a bad Windows install, or booting into Windows by default, restart your computer and press the Alt/Option key right after the beep. Keep it held down until you see a menu pop up with the available installations, just as you would to boot into recovery for OS X. So there you have it. It’s not quick, it’s not easy, but if you need to have a copy of Windows 7 on your Pro and you don’t have an optical drive, this method will work. Have problems that I haven’t covered here? Drop them in the comments and let’s see if we can get your questions answered. Image: This post is part of our contributor series.
External CD Drive, Sibon USB 3.0 CD/DVD-RW Drive, Slim High Speed CD Player Burner for Macbook Air Pro/Air/iMac and Laptop Desktops Support Windows/Vista/7/8.1/10, Mac OSX (white) by Sibon $22.99 $ 22 99. Apple cd burner. External CD DVD Drive, BENGOO USB 3.0 Ultra Slim Optical Drive Portable CD DVD-RW Burner Writer Rewriter for Apple MacBook Pro Air iMac Laptop Desktop Support Mac OS/Windows/Vista System – Silver.
The views expressed are the author's own and not necessarily shared by TNW.