Adventure Game Studio Games For Mac
What would life be like if Sierra hadn’t created early PC adventures like King’s Quest and Space Quest? Where would we be without classic Lucasarts games like The Secret of Monkey Island, Day of the Tentacle or Full Throttle? We would be culturally bereft and sad. And while big-name entries into the genre have slowed down in recent years, point and click adventure games are by no means dead. Thimbleweed Park – created by Monkey Island veterans Ron Gilbert and Gary Winnick – has recently made a big splash, and Tim Schaffer’s Double Fine is working on remastering many of the developer’s classic games for a modern era. You won’t be surprised to learn that there's also a big community out there creating their own – the majority of which make use of Adventure Game Studio, by far the easiest way to emulate the classic Sierra and Lucasarts games of yore. And while there’s a raft of free AGS games out there, some even reach commercial success.
Let’s get started, with the help of a few free assets from the instagame pack at – though you’ll want to create your own graphics when you develop your own adventure game. Prev Page 1 of 11 Next Prev Page 1 of 11 Next 1. Download and install.
The latest Mac Adventure game reviews, an overview of best Adventure Games on the Mac and new releases. AGS is an Adventure Engine to create graphical point-and-click adventure games - Adventure Game Studio ⚠ Cookies ⚠ By continuing to use this site you agree to the use of cookies.
Head on over to the and download the latest version of the software – at the time of writing, this is 3.4.0 Patch 4. You’ll also need to get hold of the which deals with a number of back-end requirements for Adventure Game Studio (AGS). Install that first, then run the AGS installer.
Leave everything selected when you’re given options, click ‘next’ through the rest of the installer, and click 'Install' when prompted. Click 'Finish' to launch the software for the first time, and click ‘Continue’ to start creating a new game. Prev Page 2 of 11 Next Prev Page 2 of 11 Next 2. Set up a project. The new game wizard offers up a number of options which you’re free to experiment with.
For this tutorial we’ll stick with the simplistic Beneath a Steel Sky-style interface (LWBASSv2.0) which uses two buttons: left-click to interact, and right-click to examine. This cuts down on the complexity – if you opt for a Lucasarts 9-verb template, you’ll have to do a lot of writing.
Enter a name for your game, a filename, and click 'Finish' to finalize the setup for your game. Click 'Build Run' to see the sample content that’s included and get a feel for what the interface can do. Prev Page 3 of 11 Next Prev Page 3 of 11 Next 3. Rooms are where the action in your game takes place.
Let’s add one: in the ‘Explore Project’ pane on the right hand side of the interface, expand ‘Rooms’, right click ‘1:’, and delete the pre-installed basic room. Then right-click ‘Rooms’ and insert a new room with the Blank Room template. Click the plus icon to expand your new room, then double click ‘Edit room’.
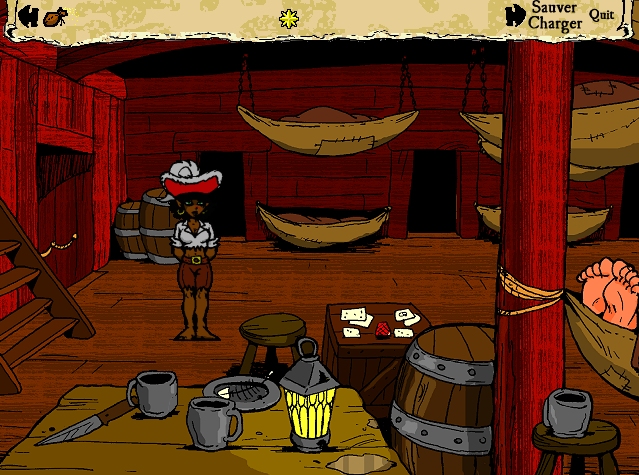
Click the 'Change' button, and find your room artwork; in our case, we’ve opted for one of the images from the Instagame pack – though we suggest you create your own and save it in PNG format before importing. Prev Page 4 of 11 Next Prev Page 4 of 11 Next 4. Room properties. Let’s tell Adventure Game Studio how to handle the room. Start by using the drop down box above to show the room’s edges, and drag these to match the limits of your room. Use the same box to select ‘Walkable areas’, and use the tools in the toolbar above to mask off the areas which you’d like your character to be able to traverse.
Click and drag with the right button to erase. Now use the drop-down box to show the room’s hotspots. These are things that your player could potentially interact with, examine, or which otherwise deserve mentioning. Paint them in as you did the walkable areas, selecting the different hotspots with the drop-down box above properties on the right. Be sure to rename each one with a Description and a name beginning with ‘h’ – our bed, for example, will have the design name hBed. Prev Page 5 of 11 Next Prev Page 5 of 11 Next 5. Event coding.
So, we need to make a thing happen when we do a thing. The simplest way to demonstrate this is to have our character say something when we interact with a hotspot. Click the lightning bolt icon above the hotspot properties to see the Events panel and, next to ‘Look at hotspot’, click the ellipsis button. You’ll be taken to a scary-looking but really not very scary coding panel, with the edges of a routine already put in place. Hop back to the room tab and add an event for interacting with the hotspot in the same way. Now, to actually get the main character to say something, enter a line in the following format between the curly braces representing each event: player.Say(“I am saying something.”); Everything there is important, from the capitalisation to the brackets to the quotes to that infuriating semicolon at the end. If you’d like your character to say multiple lines, just put another player.Say command in the next line.
Make sure everything stays within the curly braces. Prev Page 6 of 11 Next Prev Page 6 of 11 Next 6. Test and tweak. An important part of development is testing. At any time, you can see exactly how your adventure is shaping up by hitting the small play button on the upper toolbar to launch your game. Try it now – there’s nothing quite like seeing a character start speaking words you’ve put into their mouths. You’ll probably want to change a few things, though – we found, for example, that our character was walking over some of the objects in our sample room, so a tweak to the walkable area was in order.
If any of your code is wrong, you won’t even get this far: Adventure Game Studio will alert you as to what it’s found wrong, and you’ll need to poke around and fix it. Prev Page 7 of 11 Next Prev Page 7 of 11 Next 7. Our character really needs somewhere else to go. Set up another room, as we’ve done before, then head back to your original room and draw a new hotspot by the doorway, first selecting a new entry at the top of the properties window – if you don’t do this, anything you draw will simply be added to the hotspot you were working on originally. Since we’re creating an exit, let’s note where it is: get the x,y coordinates for this by hovering your mouse over your room and noting the numbers just above it – this (usually) refers to the bottom of your character’s feet, so bear that in mind. Add a bit of Interact script as we did before and, before writing any code, jump in to your second room and work out the coordinates at which you’d like your character to appear. Go back to the first room’s script, and add something like this between the door interaction’s curly braces: player.Walk(168,193, eBlock); player.ChangeRoom(2, 100, 50); This will walk the player to specific coordinate, waiting – thanks to the eBlock argument – until the player has walked to that point to continue on with the script.
It’ll then send the player sprite to room 2, at the appropriate coordinates and, since it’s our player character, the game will also switch room. Prev Page 8 of 11 Next Prev Page 8 of 11 Next 8. Making friends. Let’s add another character. You might think we’d need to head to the Character tree, but actually this process begins by adding a sprite.
Expand the sprites tree, enter the characters folder, right click on some white space and select ‘Import new sprite from file’. Find your sprite sheet – if you’re creating your own, make sure each of your sprites is placed equidistantly for ease of importing – then right-click and drag over the entire area of one of the sprites to create a yellow box. Place this covering your first sprite, left-click, and it’ll be pulled in. Repeat the action and the mask will remain the right size, so you simply need to click on the next frame of animation. Prev Page 9 of 11 Next Prev Page 9 of 11 Next 9. Looking good.
Now to add a view – selecting the specific sprites which represent the character walking, talking, or performing other actions. Right-click ‘views’ and select ‘New View’. Click ‘create new loop’, and you’ll see a pink box appear; this first view, ‘down’, is what’s used when your player is walking towards the camera, and the first sprite of any animation will be used when the character is not moving. Double click the pink box and select the first of your imported sprites.
If you’re doing walking animations – we’re not, our character is static – you can now add additional frames and import sprites in the same way. Each time you create a new loop, it’ll cover a different direction. When you’re done, set up another view for your character talking – naming it appropriately – and include your talking sprites facing in the appropriate directions. Nearly there now: we can actually set up a character.
Right-click ‘Characters’ in the explore pane and select 'New Character'. In the Properties window, set its normal view to be the first animation you worked on, and its speech view to be the second. Skim through and set up some other values – its name, starting room (we’re putting our chap in our new room), and the coordinates of your new character – and run your game to see your new addition in action.

Prev Page 10 of 11 Next Prev Page 10 of 11 Next 10. Interacting with your new character doesn’t result in an awful lot at this time, so let’s generate a quick conversation. Head to the dialogs section, right-click, and select ‘New Dialog’. Use the buttons on the left to add your questions and, between each @-number entry and return statement, write in your dialogue, using the character ScriptNames without the leading ‘c’. So, in this example, we’re writing conversation between cGirl and cMan: @1 Girl: Hello! Man: Nice to meet you. Return @2 Girl: Goodbye!
Stop Replacing the return statement with ‘stop’ on the final entry exits out of the conversation so our player can continue to explore. To assign the conversation to a character interaction, double-click on the character you want it to apply to in the right-hand pane, then click the events lightning bolt in the properties pane. Use the ellipsis button to add a script for interacting with that character, then enter a line similar to the following between the curly brackets: dDialog1.Start; Replace the first part, naturally, with whatever you’ve named your dialog internally. Give it a test: you should find that you can now interact with your new character. We have, as you’ll have noticed, barely skimmed the surface with this tutorial. We’ve not touched on items, puzzles, or any kind of meaningful scripting.
But what we’ve hopefully done is shown just how unintimidating and straightforward Adventure Game Studio really is, despite its appearance. If there’s something you want to do with it – and it’s an engine flexible enough to create action games, if you’re determined – check out the help file that comes with the software, or consult the. Good luck – we can’t wait to see what you create. Fancy making a more complex game? Check out our guide Prev Page 11 of 11 Next Prev Page 11 of 11 Next.
You can create a 2D room layout that adjusts to 3D interactive rendering which can be used to stage the room in a variety of styles that you can play with to figure out the design that works best for you.: Free The Ikea room planning tool allows you to map out the dimensions of your room in 2D that way you can plan your furniture purchases, paint colors, and flooring choices in 3D. Virtual staging software for mac. The visuals are more animated than the Autodesk Homestyler, so the impression you get may not be as accurate.