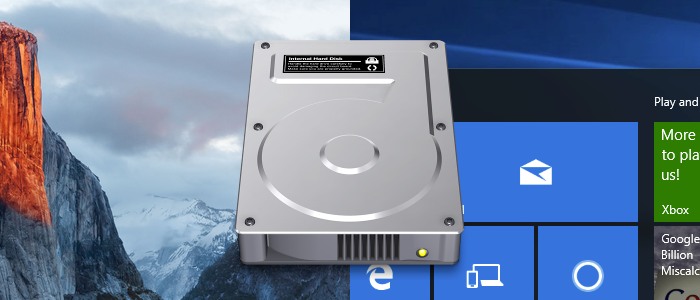
How To Install Os X El Capitan For My Windows Computer
OS X EI Captain is now available for easy download and at present, this new revolution is known to all. This lucrative downloading opportunity is now widely grabbed enthusiastically by the dedicated Mac owners as they can enjoy benefits with the latest version of OS X installed. Vr minecraft for mac with google cardboard. Apart from Mac, OS X EI captain also offers sudden yet astonishing benefits over PC. However installing MAC OS X on non- Apple hardware is a bit tiresome and complicated. This is an easy guidebook, Install OS X El Capitan on VirtualBox on PC.
How to install OS X El Capitan hackintosh on your PC: Step 14: Turn on your PC and boot from the USB drive. When you arrive at the Clover boot screen, choose the Boot Mac OS X from USB option. Now when the OS X installer loads up, set the desired language from the available options. Moreover, windows 10 can host the most recent El Capitan 10.11.4 with the help of VMware player and workstation. For Application developers, using OS X El.
What is a VirtualBox? VirtualBox is basically a program, over which you can install and eventually run OS X with Intel-based and AMD processor. You would be happy to know that, this latest technology is free to all. Its current available version is exclusively designed to meet domestic net surfing issues successfully.
OS X 10.11 Image:
Google Drive (One Full): https://goo.gl/zGI6v7
Google Drive (One Full): https://goo.gl/0HKiW9
Fix Download Limit: https://techsviewer.com/fix-download-limit
Torren.t: https://goo.gl/WH5bWc
When you are planning to run Mac OS X 10.11 EI Captain on VirtualBox and that too on windows, it will kill a fraction of your extra energy but when done it is awesome.
So, download Image and install the same and get a first-hand look and feel into the whole virtual set up and how it operates and helps you. Experience is always something worth of experiencing, and OS X on VirtualBox deserves a fraction of your time.
Computer Requirements
Windows: 7 or 8 or 10 (64bit)
Processor: Intel
Memory 3072 MB (minimum)
BIOS: Enable virtualization in BIOS (VT-x)
Software:
VirtualBox: VirtualBox 4.3.18 or 5.0
Image: Mac OS X 10.11 El Capitan Retail VirtualBox Image
Winrar or 7zip
Steps to Use Mac OS X 10.11 El Capitan Final On VirtualBox on Windows
Step 1: Extract Image File with Winrar or 7zip
Right Click Part1 or Image file then Select Extract Here:
Step 2: Install VirtualBox
This Image working on VirtualBox 4.0 and 5.0
Step 3: Create New Virtual Machine
Name: OS X El Capitan Final
Type: Mac OS X
Version: Mac OS X 10.11 El Capitan (64 bit)
Memory size is 4 GB( min 2.56 GB)
Image: OS X El Capitan Retail.vmdk
Step 4: Edit Your Virtual Machine
CPU: 2 CPU (my CPU is core i3) and Enable PAE/NX
System: Enable EFI, Disable Floppy, Chipset is PIIX3 or IHC9
Step 5: Add Code to VirtualBox with Command Prompt (cmd)
Open the Command Prompt (cmd) in Windows with Run as Administrator:
Replace “Your VM Name” with your virtual machine name then Copy – Paste to Command Prompt
Code for Virtualbox 5.x & 6.x:cd 'C:Program FilesOracleVirtualBox'VBoxManage.exe modifyvm 'Your VM Name' --cpuidset 00000001 000106e5 00100800 0098e3fd bfebfbffVBoxManage setextradata 'Your VM Name' 'VBoxInternal/Devices/efi/0/Config/DmiSystemProduct' 'iMac11,3'VBoxManage setextradata 'Your VM Name' 'VBoxInternal/Devices/efi/0/Config/DmiSystemVersion' '1.0'VBoxManage setextradata 'Your VM Name' 'VBoxInternal/Devices/efi/0/Config/DmiBoardProduct' 'Iloveapple'VBoxManage setextradata 'Your VM Name' 'VBoxInternal/Devices/smc/0/Config/DeviceKey' 'ourhardworkbythesewordsguardedpleasedontsteal(c)AppleComputerInc'VBoxManage setextradata 'Your VM Name' 'VBoxInternal/Devices/smc/0/Config/GetKeyFromRealSMC' 1
Code for Virtualbox 4.x:cd 'C:Program FilesOracleVirtualBox'VBoxManage.exe modifyvm 'Your VM Name' --cpuidset 00000001 000306a9 04100800 7fbae3ff bfebfbffVBoxManage setextradata 'Your VM Name' 'VBoxInternal/Devices/efi/0/Config/DmiSystemProduct' 'MacBookPro11,3'VBoxManage setextradata 'Your VM Name' 'VBoxInternal/Devices/efi/0/Config/DmiSystemVersion' '1.0'VBoxManage setextradata 'Your VM Name' 'VBoxInternal/Devices/efi/0/Config/DmiBoardProduct' 'Iloveapple'VBoxManage setextradata 'Your VM Name' 'VBoxInternal/Devices/smc/0/Config/DeviceKey' 'ourhardworkbythesewordsguardedpleasedontsteal(c)AppleComputerInc'VBoxManage setextradata 'Your VM Name' 'VBoxInternal/Devices/smc/0/Config/GetKeyFromRealSMC' 1
Step 6: Done! Run Your Virtual Machine:
Now, You can create a new User account on OS X El Capitan. Thanks!
New Tutorial: How to Install macOS Mojave Final on VirtualBox on Windows PC
Best card readers for mac. How to Enter Full Screen Mode in macOS in VirtualBox
How to Enable VT-X in BIOS to fix this problem