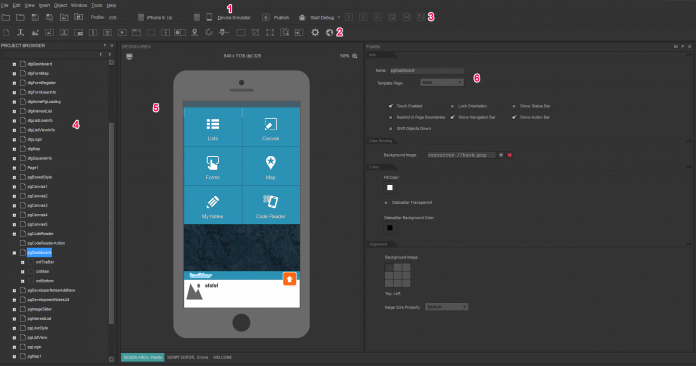
Iod Emulator For Mac
Sneak Peek at New Developer Framework for Mac Apps. See the latest in Apple technologies presented at WWDC and other events. Watch videos. Discussion Forums. Originally Answered: Is there an emulator like bluestacks but for iOS? You can enjoy the beta apps using this emulator. Compatibility– Windows, iPad, Mac, iPhone.
How to Install iOS Simulator and Android Emulator on Mac for testing and debugging your websites and webapps How to Install iOS Simulator and Android Emulator on Mac for testing and debugging your websites and webapps Introduction Mobile first! It became true in the end of 2016 when a mobile web-browsing eventually overtook a desktop one. This brings new challenges for web designers and engineers. Besides the adapted for mobile devices user interface, we also should ensure it works perfectly on a great variety of devices, screens, operation systems and web-browser engines. Several years ago, in a 'desktop era' it was enough to install all the web-browsers on the developer's machine and review a website in them.
Nowadays we also need mobile browsers which don't exist on desktop machines. Google Chrome web-browser has an emulation mode, however, it basically resizes the viewport and emulates touch events.
It works on the same Chrome's engine even if you 'emulate' iPhone. So it might be enough just to see how a website looks on small screens, but it's never a real emulation. Fortunately, we don't need to build large farms of mobile devices in our offices. The major mobile platform manufacturers, Apple and Google, provide great developer tools which include the real simulators and emulators of the mobile devices with great configuration possibilities. In this blog post I'm going to describe step-by-step how to install and configure iOS simulators and Android emulators. Prerequirements Since iOS developer tools are only available on macOS, this is the main pre-requirement: you need a Mac to test your website in iOS Simulator. Android developer tools are cross-platform and it's possible to install them on Mac, Windows and Linux.
Install iOS Simulator iOS Simulator is a part of Xcode. As a Mac user you can download and install it for free from. It downloads around 5.5 GB, so the installation takes some time depending on your network connection. After the installation is completed, launch Xcode from the Launchpad, accept license and wait for some additional installations. Finally, you'll see the Xcode welcome window. Since we are not iOS app developers, we don't need to create any projects there. As web developers all we need is just to run the iOS simulator.
Click Xcode in menu bar, Open Developer Tool and Simulator then. You've got the new iPhone X for free! This is a fully-featured simulation of iOS device. Check Hardware menu for all the capabilities. Adding more versions and devices in iOS Simulator You can change both the version of iOS and the device 'hardware' which is running it.
Open Device menu item under Hardware in menu bar. There is a list of currently available operating systems. The submenu of the selected operation system is the device to run. If you need more versions of simulated iOS, return to Xcode, select Preferences. In the Xcode menu bar item, switch to the Components tab and you'll see a list of all the available iOS versions.
Click a small arrow down icon near the simulator name to download the version you need. The simulator images are pretty large, so it will take some time to download and space in your Mac storage. Is the simulator accurate? Can you trust it?
Does it simulates the real device? Once upon a time I debugged a very specific issue. A user reported our webapp crashed the web-browser on just released iPhone 6 Plus. It worked good on any other device except for this iPhone.
We didn't have this device in the team, so the issue was really hard to reproduce and fix. We updated Xcode to get the latest versions of the simulators and finally we reproduced the issue on the simulator.
So yes, I am convinced that it's pretty accurate since it emulates even crashes and iOS bugs. Install Android Emulator As in case with iOS, Android Emulator is a part of Android developer tools. As the first step you need to download Android Studio. Run Android Studio once it's downloaded and installed. It will ask your a few configuration questions and install some additional components. I suggest to select Custom installation type and check Android Virtual Device.
Then continue the installation leaving the default settings and wait for downloading of components. After it's completed, you'll see the Android Studio welcome window. Despite the fact we need the emulator only, it's required to start a new Android project there.
I just entered Emulator as a project name, add no activity and left the other settings default. Need to wait a few more downloads and installs and get the Android Studio workspace. No, it's not a finish yet. It might be just early release issues, but just after install from scratch, Android Studio still required to install some missing components: android-26 platform first and Build Tools 26.0.2 later.
Just click the Install links and follow the installer screens. After all activity is done, there is a clean Android Studio workspace. You can find Android emulator under Tools - Android - AVD Manager menu. It opens Android Virtual Devices (AVD) Manager window.
You can notice a warning there: HAXM is not installed. This is Intel Hardware Accelerated Execution Manager, and it's required to run the emulator. However, at the moment it doesn't support automatic installation on macOS High Sierra (10.13), so you need to install it manually. Hopefully, they'll fix it in the future versions. Open Finder and navigate to /Library/Android/sdk/extras/intel/HardwareAcceleratedExecutionManager/.
There is a file IntelHAXM6.2.1.dmg. Run it and follow the installer instructions. During the installation, macOS might show a warning that the kernel extension is blocked by security reasons. Then you need to open Security & Privacy window in the System Preferences and click Allow button. Return back to AVD Manager and click Refresh button in the bottom right corner. The warning message should disappear. We are good to go!
AVD Manager already has a preconfigured Android emulator of the latest Android version. Just double click it. The emulator has control buttons at the right side of the screen. It has a complete set of emulations just like iOS simulator.
Adding more versions and devices in Android Emulator To get more device configurations and Android versions, click Create Virtual Device button. There you can select either a ready-to-use device hardware preset or to create your own hardware profile. On the next step you should select the version of Android which you'd like to run on the selected hardware. You'll need to download the older versions of Android before usage. Check out the x86 images to get more versions to use. Click Next and Finish on the next screen and you'll get the new configured virtual device which is ready to run on the Android Emulator.
Debugging in iOS Simulator Debugging capabilities are essentials for the engineers. Before we just ran the simulators and emulators and could see and interact with UI. Now we need to get the console, to inspect and to debug.
For iOS simulator it's possible using Safari web-browser. Firstly, ensure that you have Developer menu activated: in Safari menu open Preferences. And switch to Advanced tab. At the very bottom of the window check Show Develop menu in menu bar.
Now run the simulator, open a required website in the iOS Safari, then open Safari on your macOS. In the Simulator menu under Develop menu there is an item related to the opened in iOS Safari website. It opens a fully-featured Safari Web Inspector with the loaded in the simulator website.
Debugging in Android Emulator Debugging websites in Android emulator web-browser is possible in desktop version of Google Chrome web-browser. However, this feature works starting with Android 4.4.
Sad but true. Run the emulator (Android version 4.4 or above) and open a website in the system web-browser. Then open your desktop Google Chrome and open the Developer Tools.
In 'three dots' menu of the developer tools, find More tools and ensure you have Remote devices enabled. It opens the related tab. If your emulator is up and running, you'll see Android SDK built for x86 - connected in the device list. Click it, find the page you want to debug and then click Inspect. Finally, it opens a separate window with the fully-featured developer tools with the required page loaded.
Please note that if you’d like to open a website which is running on your local machine server (its address is usually localhost or 127.0.0.1), in the Android emulator this address won’t be valid. The right address you should enter to access the local webserver on your machine is 10.0.2.2.
Retired Document Important: The information in this document is deprecated in Xcode 9. For Xcode 9 and later, see Simulator Help by choosing Help Simulator Help in Simulator. Getting Started in Simulator Simulator app, available within Xcode, presents the iPhone, iPad, or Apple Watch user interface in a window on your Mac computer. You interact with Simulator by using the keyboard and the mouse to emulate taps, device rotation, and other user actions. The chapter presents the basics of using Simulator. You can perform these steps using your own iOS app or, if you do not have an app to use, with the HelloWorld sample code. For more detailed information on interacting with Simulator and using it to test and debug your apps, refer to the later chapters in this guide.
Access Simulator from Xcode There are two different ways to access Simulator through Xcode. The first way is to run your app in Simulator, and the second way is to launch Simulator without running an app. Running Your iOS App When testing an app in Simulator, it is easiest to launch and run your app in Simulator directly from your Xcode project. To run your app in Simulator, choose an iOS simulator—for example, iPhone 6 Plus, iPad Air, or iPhone 6 + Apple Watch - 38mm—from the Xcode scheme pop-up menu, and click Run. Xcode builds your project and then launches the most recent version of your app running in Simulator on your Mac screen, as shown in Figure 1-1.
Figure 1-1 Simulated iPhone running the HelloWorld app. Note: If you are testing an app with a deployment target of iPad, you can test only on a simulated iPad.
If you are testing an app with a deployment target of iPhone or universal, you can test on either a simulated iPhone or a simulated iPad. Running Your watchOS App To run your WatckKit app, choose a combination of an iOS device and watchOS device from the Xcode scheme pop-up menu.
For example, to run the watch app in a 38mm watch paired with an iPhone 6, choose 'iPhone 6 + Apple Watch - 38mm' from the scheme pop-up menu. Running the WatchKit target launches two simulators, one for the iOS device and one for the watchOS device. Figure 1-2 shows an iPhone 6 and a 42mm watch running in two different simulators. Figure 1-2 Simulated iPhone and watch Running Your tvOS App To run your tvOS App, choose a tvOS device from the Xcode scheme pop-up menu. Running the tvOS target launches the most recent version of your app in a simulated new Apple TV device, as shown in Figure 1-3. Figure 1-3 Simulating tvOS Launching Simulator Without Running an App At times, you may want to launch Simulator without running an app. This approach is helpful if you want to test how your app launches from the Home screen of a device or if you want to test a web app in Safari on a simulated iOS device.
To launch a Simulator without running an app. Launch Xcode. Do one of the following:.
Choose Xcode Open Developer Tool Simulator. Control-click the Xcode icon in the Dock, and from the shortcut menu, choose Open Developer Tool Simulator. To launch a watchOS Simulator without running an app.
Launch Xcode. Do one of the following:. Choose Xcode Open Developer Tool Simulator (watchOS). Control-click the Xcode icon in the Dock, and from the shortcut menu, choose Open Developer Tool Simulator (watchOS).
Simulator opens and displays the Home screen of whichever simulated device was last used. View the Installed Apps From the Home screen, you have access to all of the apps that are installed in the simulation environment. There are two ways to access the Home screen in Simulator from your app:. Press Command-Shift-H. Choose Hardware Home. Use the installed apps to test your app’s interaction with them.
For example, if you are testing a game, you can use Simulator to ensure that the game is using Game Center correctly. IOS Device Home Screen Much like the Home screen on an iOS device, the simulator’s iOS Home screen has multiple pages. After clicking the Home button (or accessing the Home screen through the Hardware menu), you arrive at the second page of the Home screen.
To get to the first page, where all of the preinstalled apps are found, swipe to the first Home screen by dragging to the right on the simulator screen. On the Home screen, you see that all of the apps that have been preloaded into Simulator. See iOS Device Home Screen. Figure 1-4 Home screen for a simulated iOS device The apps that you see on the Home screen are specific to the iOS device simulation environment. Because Passbook and the Health app are available only for the iPhone, these apps don’t appear if you are simulating a legacy device or an unsupported device type.
WatchOS Device Home Screen The Home screen for a simulated watchOS device behaves the same as it would on an actual device. You can click and drag to simulate the finger dragging around the screen and launch an app by clicking on it. Figure 1-4 shows the home screen of a 42mm watch with a developer app, the Lister sample code. Figure 1-5 Home screen for a simulated watchOS device Use Safari to Test Web Apps From the Home screen, you can access Safari within Simulator. Use Safari to test your iOS web apps directly on your Mac.
From the Home screen, click Safari. In the address field in Safari, type the URL of your web app and press the Return key. If your Mac is connected to the Internet, it displays the mobile version of the URL you specified. For example, type apple.com into the address field and press Return.
Safari displays the Apple website. See Figure 1-6. Figure 1-6 The Apple website running in Safari in Simulator Use Maps to Simulate Location Awareness Simulator provides tools to assist you in debugging your apps.
One of the many features you can debug in Simulator is location awareness within your app. Set a location by choosing Debug Location location of choice. The menu has items to simulate a static location or following a route.
A simulated watchOS device with the location set to None checks the paired iPhone device for the location. You can specify your own location, which can be seen in the Maps app. From the Home screen, click Maps. Choose Debug Location Custom Location.
In the window that appears, type the number 40.75 in the latitude field and the number -73.75 in the longitude field. Click the Current Location button in the bottom-left corner of the simulated device screen. After completing this task, notice that the blue dot representing your location is in New York, NY, near the Long Island Expressway, as shown in Figure 1-7. Figure 1-7 Running Maps and simulating a latitude and longitude in Simulator Change the Simulated Device and OS Version Simulator provides the ability to simulate many different combinations of device type and OS version. A device type is a model of iPhone, iPad, or Apple TV. Some iPhone devices can also have a paired Apple Watch. Each device-OS combination has its own simulation environment with its own settings and apps.
Simulator provides simulators for common device-iOS, device-watchOS-iOS device, and device-tvOS combinations. You can also add simulators for a specific combination you want to test. However, not all device type and OS version combinations are available. Note: To test apps for the iPad mini, use a simulated iPad with the same pixel resolution as the iPad mini. You can switch between different device-OS combinations. Switching closes the window for the existing device and then opens a new window with the selected device. The existing device goes through a normal OS shutdown sequence, though the timeout might be longer than the one on a real device.
The new device goes through a normal OS startup sequence. To change the simulated device. Choose a Hardware Device device of choice. Simulator closes the active device window and opens a new window with the selected device. If the device type and OS version combination you want to use is not in the Device submenu, create a simulator for it. To add a simulator. Choose Hardware Device Manage Devices.
Xcode opens the Devices window. At the bottom of the left column, click the Add button (+). In the dialog that appears, enter a name in the Simulator Name text field and choose the device from the Device Type pop-up menu. Choose the OS version from the iOS Version pop-up menu. Alternatively, if the iOS version you want to use isn’t in the iOS Version pop-up menu, choose “Download more simulators” and follow the steps to download a simulator. Click Create. If the OS version you want to use is not installed, download it and follow the steps to add a simulator again.
To download a simulator. In Xcode, choose Xcode Preferences. In the Preferences window, click Downloads. In Components, find the legacy simulator version you want to add, and click the Install button. You can also delete and rename simulators in the Devices window.
To delete a simulator. In Simulator, choose Hardware Device Manage Devices, or in Xcode, choose Window Devices.
Xcode opens the Devices window. In the left column, select the simulator.
At the bottom of the left column, click the Action button (the gear next to the Add button). Choose Delete from the Action menu. In the dialog that appears, click Delete. To rename a simulator, choose Rename from the Action menu and enter a new name. For how to manage real devices that appear in the Devices window, read. Alter the Settings of the Simulated Device You can alter the settings within Simulator to help test your app.
On a simulated device, use the Settings app. To open the Settings app, go to the Home screen and click or on tvOS, choose Settings. In Figure 1-8 you see the Settings app as it appears when launched in the iOS simulation environment. Figure 1-8 Example of the Settings app in a simulated iPad device The Simulator settings differ from the settings found on a hardware device. Simulator is designed for testing your apps, whereas a hardware device is designed for use.
Because Simulator is designed for testing apps, its settings are naturally focused on testing, too. For example, in a simulated iOS device the Accessibility menu provides the ability to turn on the Accessibility Inspector, and the Accessibility menu on a device allows you to turn on and off different accessibility features. Through the settings, you can test both accessibility and localization of your app. See for information on how to manipulate your settings for the various types of testing you are interested in. Remember: Changes made in the Settings app of simulated device affect only the simulation environment that is currently running. Rotate iOS Devices You can use Simulator to manipulate the simulated device much as you do a physical device.
Games for mac os 10.11 7. To rotate your simulated device, choose Hardware Rotate Left. When you rotate your simulated device, Settings rotates (see Figure 1-9), just as it would on a hardware device.
Figure 1-9 A rotated simulated iPad running in the iOS simulation environment Test in Simulator and on a Device Simulator is designed to assist you in designing, rapidly prototyping, and testing your app, but it should never serve as your sole platform for testing. One reason is that not all apps are available in the simulator.
For example, the Camera app is available only on hardware devices and cannot be replicated in the simulator. In addition, not all bugs and performance problems can be caught through testing in Simulator alone.
You’ll learn more about performance differences in. You can also find more information on testing your app on a device in Launching Your App on Devices in App Distribution Guide. Quit Simulator Simulator continues running until you quit it. Quitting Xcode will not close Simulator because they are separate applications.
Similarly quitting simulator will not close Xcode. To quit Simulator, choose Simulator Quit Simulator. The device is shut down, terminating any running apps.